
As a pet owner, the initial warning signs of a flea infestation can be alarming. When your pet begins scratching or itching, bite marks become visible, or small pepper-like spots of “flea dirt” appear, your initial reaction may be to freak out. However, you can execute flea prevention in 5 simple steps, reducing your chances of a run-in with fleas or restoring your home after a recent outbreak on your own.
Step One: Landscaping Cleanup
The first step you can take in eliminating flea infestations is cleaning up your yard. Areas full of weeds or shrubbery offering shade and moisture often become attractive hotspots for fleas to dwell in. Mow through any overgrown grass and dispose of any plant debris, brush, or excessive foliage to expose any concealed fleas. By eradicating these potential hiding spots, you build up a sunny environment that fleas cannot tolerate, ideally framing a flea-free yard.
Step Two: Detract Rodents
Rodents like mice, rats, squirrels, rabbits, and varmints traveling in and out of your yard can carry fleas, exposing you and your home to the threat of a flea infestation. To deter rodents from contaminating your home, take away hiding spots where they may reside, including small crawl spaces, spots behind appliances, and any spaces for storage or insulation where they may nest. Fruit or nuts from trees and over-watered pots provide convenient conditions for rodent habitation. Seasonal cleanup, adequate drainage, and rodent control can dissuade flea carriers from stopping in your backyard.
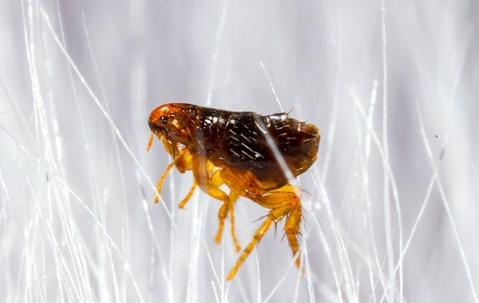
Step Three: Treat Your Pets
If you are concerned your pet may have fleas, call your veterinarian or friendly pet store experts for tips and protocols for flea removal and prevention. Regular treatments for heartworm and pet health can also include flea prevention. Consult with your veterinarian about grooming methods and regularly inspect your pet’s fur for any obvious bites or lumps remaining. In addition, make sure to go through and clean your pet's favorite hang-out spots, including kennels, litter boxes, bedding, or sofa cushions where additional fleas may have spread.
Step Four: Talk To a Pest Control Professional
To get rid of any active fleas or treat any problem areas, call a pest guy for preventive treatments. Prepare your yard and home by picking up areas that may be sprayed with the product, and keep your pets away from treated areas until they have dried. Feel free to ask questions, and remember that we are here to help assist you in any way we can.
Step Five: Interior Cleanup
Once you have completed the above steps, treat yourself to a vacuum frenzy! Go around your home and vacuum through floors, carpets, and corners while searching for any nooks and crannies that may be missed in a brief sweep. More is merrier, and there is no such thing as too much, so treat your vacuum like a new invention that you can’t get enough of. Lastly, when finished, empty out the canister or bag, or place the vacuum outside to dispose of any remnants.
Remember to stay calm throughout the flea treatment process and ensure you work through each step carefully. Flea infestations are normal, but by maintaining your efforts through the flea treatment process, you can greatly reduce the chances of fleas returning to your home or on your pets. Then you can relax and be like buddy down below.